Saturday, May 29, 2010

Glass Wall Critter

Project : Glass Wall Critter
Date : Summer/Fall? 2009
Materials : bottle-cap, wire, suction cups, a bell, fabric (2 types), embroidery floss
Tools : pliers, scissors, needle, hand powered drill
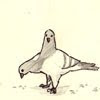
Finished Product:


Process:
Bottle cap monsters are pretty easy. You take a bottle cap, you put fabric around it. Done. Thine one has only one real modification--
Before you start any fabric stuff, get a drill (or nail and hammer might work?) and poke 2 holds in the bottle cap edge. These are the leg holes so they should be sorta' on the same side, close but not too close. Hip-width. Then, string wire through the wholes. It helps if you have twisted double wire, maybe run a wire up one leg, across the outside of the bottle edge, and down the other. Things like this will help prevent the legs from swinging too much. You want the legs to project out from the edge, not to lay flat against the edge. Laying tape down or hot-gluing the wire that runs between the leg holes might help (I can't remember if I did or not).

Make sure the leg wire has an extra length at the end. Suction cups usually come with hooks- wiggle those off and then wrap the wire around the nub. This should be a secure anchor.

Now cut the fabric. There are few pieces and they're easy to measure by placing a (fresh, different) bottle cap on paper and tracing it.
Fabric 1 :
A circle for the rump. The circumference of the edge split into 2 pieces of "inside" the legs and "outside the legs". Remember that the edges need extra fabric to fold over. Cut strips of fabric long enough to cover the wire legs. Be sure to flare at the end to cover the suction cup nub on top.

Fabric 2 :
Cut a triangle whole's base is the length of the "outside the legs" circumference. Then cut a tiny wedge whose length is the "inside". Those two are the top & bottom of the head.

Sew the leg fabric over the suction cups and up the leg. Sew the "outside the legs" fabric to the rump and then to the legs themselves. Then do the "inside the legs" strip. Now hopefully you have somewhere inside you can anchor an extra length of wire to (the wire between the leg holes?). Cut a single wire line that will exceed the length of the head. This is the antenna. Sew the head fabric on but leave the "nose" open a bit, where the antenna wire pokes out from. We're going to wrap the antenna wire with embroidery floss (keep it at 6 strands for thickness). The way to do this is....

I probably need a picture for this. I'm sure there's a name for it. Make a series of loops/twists. As you go, you'll realize that each loop/twist leaves a "bump" This is fine. The loop/twist... it's... you twist the loop, put the antenna wire in the middle, and then pull the tail of the thread up through the middle of the loop. Enough of these, made close enough together, is how you cover the wire. Remember to put a bell at the end of the antenna (before you cover it). Now close the nose. Done!

Thoughts : Very cute, very easy monster. This has to be one of the worst written Process sections on my blog so far though.... Sturdy wire legs and the suction cups make it easy to place and post. The bell is cute and the little ring of the bell makes it playful. A fun toy to have on the desk. Can stand easily on the ground due to the cups as it can on windows. The nose could sometimes hold a pencil/pen, but not very sturdy like. At Christmas I had it hold a candy cane so I guess it's not that weak.

Despite such a crummy Process section, this is one of the projects I actually recommend someone tries. Not that anyone reading this is very interested in making the projects I detail (who the hell is reading this anyway?) but if one were to attempt a project this has a good rewarding to easy-to-make ratio.

All the office peons were trapped behind glass. What was it there for, no one knew. It was large enough to act like a wall but served none- and we do mean none of a wall's purposes. We weren't to lean on it. We weren't to hang stuff from it. We weren't to write on it. It didn't block sight or sound. It was simply this.... obstruction. A symbol of the cages we were trapped in.

Which is why I made a creature to perch so clearly upon the wall. A little bell to ring to make sure you saw it there. A single antenna to extend, like a slender middle finger, and say "Fuck You" with.

Thursday, May 27, 2010

Light-Bulb Raptor

Project : Light Bulb Raptor
Date : Fall 2009?
Materials : 1 lightbulb, melted red crayon, fabric (2 major, 2 minor), thread, yarn, wire, chain, stuffing, 4 beads
Tools : pliers, hammer, needle, scissors
Finished Product:

Process:
Part 1 : Lightbulb.
So you take a lightbulb. Then you get a hammer and you smack it a couple times. No, not on the glass part. What you're doing is trying to chip the very bottom of the lightbulb where it screws into the socket- see, that part is glass down there too. You've got to chip the very sturdy & solid glass at the bottom of the bulb enough for you to get in there with pliers and finish the job. Knock out all the glass at the bottom, reach in and pull out the inner parts with pliers, and then clean out the inside. I don't know, but I assume that the white coating is bad for you. I assume the whole thing is bad for you. I tend to use a damp paper towel. Eventually I need to rince it with water, but I leave the used water out to evaporate and toss whatever it dried up in away (rather then dump it down the sink. Cracking and cleaning out lightbulbs is fun and mildly therapeutic, in my opinion. I often will empty a light bulb (once it's dead) for the fun of it, even if I don't have a project in mind.

Part 2 : Crayons.
I used melted crayon wax (red of course) to cover the raw end of the bulb, where I opened it. If you are only going to melt crayons once or twice (who could possibly stop at that??) then make little meth-head like spoons out of wire and tinfoil to hold the melted crayon over a candle with. If you're going to do it more (and you shooooould), invest in a basic metal ladle- I got a pair at a cooking store and have been exceptionally happy with my purchase. I also have one of those magnifying-glass/gator clip assistans that will hold the ladle over the candle for me. How cool is that? Anyway, I poored tiny bits of crayon in at a time and spun the bulb. As you can see, a couple drops slipped down but I'm happy more didn't spill. Less is more.

Part 3 : Fabric.
So I had this awesome bulb that looked mildly bloody. I sewed a tight fabric sleeve around it in red from which to build on. Realizing that making it the mouth/opening into some creature would just look too inappropriate, I drape a creature over it. First just the curved back in blue, with two blue extensions hanging down for legs eventually. Then a blue extension for the top of the snout. Then two slivers of white for the lips. Then a long white strip for under the throat. Now it's time to sew and wire the mouth. I can't remember if I sewed the wire down to the body fabric or to the red mouth fabric first. Always attach the wire to the fabric directly! Then I attached the fabric to the fabric. The head is done.

Cut white fabric for the inner thigh and sew up. As you're doing so, run a wire through and leave the "ends" of the thigh loose- we'll close them after we do the chicken legs. For the legs, take basic strips of gold fabric and twist them around the leg. Then take a thick strand of yarn and do a sparse twist around the leg. Then use pale tan (and hopefully mildly invisible) sewing thread (not embroidery floss!) to hold it all in place. Once the legs are done, go back and close up the thigh-- you should be able to tuck the ragged end of the chicken legs under the thigh fabric for a cleaner close. Add a pair of black beads for claws (I didn't have enough for the hind fingers sadly)

Now consider the tail. Note that even now with the very posable legs the creature can't actually stand. It's unbalanced unsurprisingly! So find a nice length of weighty chain. Simple rocks/rice stuffing wont work because it'll puddle incorrectly. The chain is a heavy weight all the way down. Hook that to the body (attaching to the wire in the legs for a good anchor), wrap with stuffing, and then cut fabric to cover it. Sew it all down and you're done.

Thoughts :
Cute! Super cute! I don't know why, but it's cute despite having a gaping wound as if a lightbulb had been shoved into it's gut. This took a comparatively quick time to make. One evening to gut the bulb and coat it. And then two evenings worth of work for the sewing (I think... this was a while ago....). I received several comments from the people at work about it- it's one of the most popular pieces so far. The tight fitting of the head/jaw wire really helps I think. The wide mouth is also intriguing- I often try for a "wedge" shaped head but so rarely succeed like I did here.

So the tail twists... so what. That's what happens when you pull your fabric to line up rather then cutting the patterns correctly in the first place.

At work I in theory used it to store a single pen. The bulb opening was too narrow for more then one pen/pencil... the mouth could hold one as well.... overall, far more good looking then it is practical.
A co-worker's young son was quite taken by the beast-y. The father even inquired the next day at work as to how one could make it. Imagine that! A young lad not normally given to the 'feminine' arts was so inspired by my critter he actually wanted to learn to sew so he too could make one! Thrilling! What better compliment is there?

Alas, while paper was cut before fabric there was no way to transmit the 'pattern'. How can you explain something that was constructed via a feeling and tugging of fabric? This is one of the most non-replicable creatures I've made due to the melding of bulb and fabric and wire. And so I wrung my hands and made vague mutterings and provided nothing useful. Typical. An excellent opportunity lost.

Friday, January 29, 2010

How To Crochet A Monster

Project : Crocheting Monsters - How To : Part 1 The Body
Reasoning: This is a work-in-progress post. Inspired by a Ravelry msg board discussion.
Rough Draft :
1. The Body

A good monster leans on the kidney shape with all its might. At least for the look I aim for. Spheres and cones can get you somewhere, sure, but not where I'm going. It's the kidney. So organic! So in flux! So versatile! One of my cardinal rules when worken' it is to never have a static shape. Tubes are death. Death tubes. Of yarn. This becomes far more difficult when working on limbs, but that's a problem for another day. At least with the torso, tubes are pretty easy to avoid. Cones are just kidneys you don't round out and bend sharply enough.

Why kidney? Because kidney can be anything! And you should approach the project open to anything. Starting a crochet monster is like starting a relationship. Don't go in with too many strong expectations. You can have some basic ground rules- color, size, texture, mood- but anything more will be stifling. Especially for the first, say 5 or so. Be open. Be flexible. If you don't have a specific shape, you can't fail. And that is why the kidney is awesome. Say you start off hoping for an 4 limbed monster with a slightly hunched back. Camel like, lets say. But oops! You curved too sharply and tapered the rump/main bump off too slowly. Well now you just turn that on end, and you've got an upright with a hunched back-- maybe the head built in already. It's all good.

Okay, sure, lets say we all love kidney's now. How to make them? I use (on the torso at least) only 3 things- increase, decrease, and double back. I don't know how common it is, but when I'm crocheting I chug along one way, hook in hand X. Well, if I want to induce a turn, I just toss my hook in to the opposite and and start pilling stitches on in the other direction, back-tracking. This doubling back- first spanning a large area and then shortening the span as you add more rows- is the easiest way to get a gradual curve. This also helps with the flaring that you find in a kidney bean shape.

The key to working with a changing shape is to always be aware of your 'future tube' projection. Look at the "rim" of your crochet. Imagine what would happen if you added twenty rows without any increases or decreases or double-backs. Here I'm going to reference my icky-ugly image. We are looking at a kidney shape from slightly 'behind and above'. You might think I'd say 'we started working from the tiny end down' but I must state that I usually start a little ways down from the actual 'tiny end' end. I start 25% of the way 'down', work towards the big end. Then clip it, do the tiny end, then go back and close off the tiny little gap I left remaining on the big end. Helps with stuffing & weights. But anyway! I digress... shaping....

In this image. We see Figure A. Imagine that we started crocheting right there on that left most red band. Well, if we look at Figure B. you can see the green 'future tube' that path will take us. Ick! We have to aim the tube downwards. And so I do some double backs. Back in Figure A. the red lines mean I'm crocheting <--- and the green lines mean I'm crocheting ---->. After I've done that you can see my 'future tube' in Figure B. Hmmm... Now I'm angled too far down! And kind of too thick. Well, don't freak out. I have to continue out to the vague purple dotted line there before I've reached my max girth, then I can start rapidly dwindling. How does the 'future tube' help me know that? Well... I can't quite put my finger on it, but it does....

Note that when I'm going from Figure C. as is to the purple dotted line, doubling back alone isn't going to cut it. I'm increasing my area and that means increases in my stitching. Note that the length of the dotted purple line is far larger then the length of the current edge (measured from where it intersects the dotted line). This, plus the fact that I'm not actually curving that rapidly, is what tells me double-backs and increases are what I want.

I can't stress enough how to think about each stitch taking a uniform space. Now I'm going to violate this rule in future posts, but for the most part, pretend that every stitch is the same size. One stitch = one stitch blob. If you increase, when you get back to that spot on the next row you will have two blobs where you earlier had one. When you decrease, right then and there you are squishing two blobs into one. When you double-back be mindful that there your perimeter grows and therefor more blobs are being added to the rim over time slowly. Stitches are blobs and blobs want to be evenly distributed. So if you increase at evenly spaced out intervals, your shape will gradually expand. If you increase rapidly in one location, or at the same spot every time around the row, you'll get a cancer blob. Which isn't always a bad thing. Stitch blobs can only take up X amount of space each (no stretching) and they only WANT to take up X amount of space (no crowding).

If you can make it through all that text above, I applaud you. Makes my eyes cross a bit just reading it. A couple final notes about the torso-
  • don't add wire-frame (if you're going to add it) until after you finish the torso. If you need a spine running through the torso, wait till as long as possible to avoid adding it. I'll talk more about this later
  • Stuff as you go (even if it can potentially fall out the other end). Seeing the shape evolve in it's inflated form really helps!
  • I only work with 'fuzzy' yarn. This is because if you work with non-fuzzy, sock-like yarn you can see the actual stitches clearly and they don't look that nice. This is tooootally opposite the whole arigumi style. I aim for slightly furry (but not Fun Fur level) yarns. If your yarn isn't fuzzy (enough), AFTER you finish the project, you can take a cat brush to it and make it fuzzy. Damnit.
  • Multi-color bodies are hard. First do torsos all in one yarn. The, eventually put a split somewhere- the rump or neck is a different color. Then, eventually, a tummy or stripes is possible, but switching between yarns makes shaping hard. I'm just finishing something with spots. That was *really* hard (and the spots didn't turn out all that well)
  • If it wasn't clear from this topic- start with the torso. Head, limbs, etc comes later. Just torso to start with! Just torso!

Next Topic : Limbs
(Eventual Topics : Head, Extra Body Parts, Non-Yarn Items)

Tuesday, January 19, 2010

Review: CD Swap : 2 : Tree

Project : CD Swap 2010 Review 2 of 12
CD Name : (the image of a tree- sorta' Prince like. I'll call it Tree for now)
Arranged By : Helen
Duration : 1.3 hours
Tracks :

Shempi Ratatat
1980 World Champion The Bad Plus
Unless It's Kicks Okkervil River
Shaping Lights Ohm Guru
Neighborhood 1- Tunnels Arcade Fire
Phenomena Yeah Yeah Yeahs
The Big Score The Fort Knox Five
A Love Song Part 2 Foxtail Somersault
World Class Tomihira
All To Be Undone Tomihira
Ayahuasca Deep Fall Gaudi
A cheater's armoury Hanne Hukkelberg
We're From Barcelona I'm From Barcelona
Just For Now Imogen Heap
"Andy, You're A Star The Killers
Black Magic Carpet Lilys
From a Tower love like fire
Letter Read Rachael Yamagata
A Love Idea Mark Knopfler/Last Exit To Brooklyn Soundtrack


CD case:


First listened to it : The first half was in the car while I was driving down with Adam from SF to Mt. View. 1/10/10 @ ~5:32 pm. In it's entirety would be 1/12/10 @ 8:16pm

Favorite Track: I liked track 4- Shaping Lights as well as track 11 Ayahuasca Deep Fall. They both fit well with the CD and work well stand alone. Since listening to it my preference between the two swings one way and then back the other.

Overall Thoughts: A solid CD. It has a very strong "walking somewhere" sound to me. A steady beat throughout everything- some songs are slower, some are a bit faster- but I felt always. I feel that it goes from strange instrumental songs back to indie quite well. A vaguely feel-good CD.

Specific Thoughts: First off my CD is scratched. This causes some tension between Adam and I because I think his dying car stereo might have done some of this. He claims it came that way. The CD is listenable, but on my computer Neighborhood 1- Tunnels had some hiccups.

I like the CD casing. It's simple and pretty and sturdy and thin. A CD casing I'm likely to keep for the entire CD's lifetime. My Tree CD was #7-- I like that it is numbered.

As I said in the Overall section, a strong, well flowing CD. All, that is, except for the second track. On initial listening I tried to defend it but repeated plays I'm still, like, -"WTF?" when it comes on. But it rolls by rather quickly and everything else flows. I like the mix of female and male musicians- I feel most CDs fail to mix them properly. A little on the long side, but there isn't a single turning point where this was obvious. I'd shake my finger about the 3 songs coming from the same sampler- that's cheating for a mix CD!- but I've used 2 from the same source myself (I just was clever enough to list them as coming from their original sources). Still, 2 songs by the same artist back to back looks strange on paper... though I don't believe my ear noticed much.

I find it interesting that I like, but am not wildly in love with the CD. I feel this stems from the fact that the music select is similar enough to what I listen to that I can follow along but lacks the more aggressive style I like and therefor fails to kindle great passion in my heart.

Closing Thought :
Fish! I swear the CD sang of fish! From the opening track I had such a visual image of a young, normal girl walking down the street observing fish swimming through the air about her. Three or more other tracks backed this vivid image up. Strange... intentional?

CDexchangeDisk2

Monday, January 18, 2010

In-Progress

Project : Unnamed
Date : 1/18/10
Materials : Yarn!
Tools : Crochet Hook

Current State!:

Thoughts :
I wish I didn't post so infrequently... and try as I might I can't produce creations faster... The compromise? Post in-progress reports.
They're playing Rockband downstairs.... When discussing this fellow, the idea of a more awesome version with stake knives, rather then suction cup, feet was suggested. If it wasn't already promised to Adam, I'd switch.... The idea of a larger creature, with coin scales and a large butcher knife fin/spine was also discussed... with fishing hooks for claws....

Wednesday, January 13, 2010

Review: CD Swap : 1 : CD Exchange 2010

Project : CD Swap 2010 Review 1 of 12
CD Name : CD Exchange 2010?
Arranged By : ?
Duration : 1: hr 12 min
Tracks :
CORRECT playlist order
wenn ich einmal soll scheiden (When once I must depart)J. S. Bach
FratresArvo Part
From me flows what you call timeToru Takemitsu
Anthem - Part 3Philip Glass
OlsonBoards of Canada
All that makes us human continuesBT
In MindDo Make Say Think


INCORRECT playlist order... listened to first, by accident
OlsonBoards of Canada
All that makes us human continuesBT
In MindDo Make Say Think
FratresArvo Part
wenn ich einmal soll scheiden (When once I must depart)J. S. Bach
From me flows what you call timeToru Takemitsu
Anthem - Part 3Philip Glass


CD case:


First listened to it : while sitting in Adam's apartment. Football is on TV but muted -- 1/10/10 10:34 am
Favorite Track: All that makes us human continues as a close second, with Fratres as a close second.

Overall Thoughts: A very mellow CD. Instrumental, soothing. Complex sounding without building that much energy. Very soundtracky without containing any noticable soundtrack songs. Starts classical, ends electronicy

Specific Thoughts:
First of all, the whole not being an audio CD-- not cool. It couldn't be played in Adam's CD player in his house or in the car, which made me sad. Also, despite the warning on the CD both Adam and I miss-understoond and listened to the entire CD out of order the first time around.

Upon listening to it a second time, my feelings are much warmer. The first two tracks start off well. But then a 36 minute track, POW! The song(s. I pluralize because it has several gaps in the track itself, breaking it up) I have no complaint against... but the duration... too much.

The second song sounded like several things to me- bouncing between Star Wars and Predator at times. The crazy marimba music woven into it was... strange. I really enjoyed the second track the most and felt the first one was a good build up to it.

The 'From me flows what you call time' track has crazy marimba music. Not sure how I feel about that. Very sound-track sounding. Very mellow... I at times almost forget it's playing. Seems like I need to have good quality headphones on to enjoy it. The track is 36 minutes long and sounds like several songs- even has pauses where transitions are between them. One of the parts reminds me of the Predator soundtrack a bit.. Also, a minute of silence at the end of the track? Was it necessary?

I like the second half of the CD- good transitions between songs. I like how strange 'all that makes us human continues' becomes... Reminds me a bit of 65daysofstatic.

Closing Thought :
From ethereal fey to 60s sci-fi robot to enthusiastic creature... Can't say I was on the same page as the sound, but at least it was cohesive. Really. fey, robot, monster... cohesive, trust me.

CD Mix Swap : CD 1

Sunday, January 10, 2010

Upcoming Posts - Doug's CD Exchange party '09-'10

Project : Post a review for each CD
Date : 1/9/10 @ 8pm
CD count : 10 (including my own) + possibly 2 more later

What?: Adam and I were kindly invited/allowed to be part of Doug's CD swap this year. Thirteen people total were involved this year. The goal- create a mighty fine mix CD and then make 12 copies of it and in return receive 12 new mix CDs. This is our second year and both times we had a great time and spent a lot of effort on our playlists and CD packaging. Others spent more time, others spent less time. For us though it was great fun to talk about music (Adam much enjoys speaking at great lengths about music, he has a vast collection, varied taste, and great memory for such things) and to design a mass produced art project (the packaging quest was my favorite stage)

The goal: To make a blog post reviewing each individual CD. Last year we listened to them but not much came from it. This year I hope to meditate upon each and share the details of it as well as my thoughts. I will be reviewing both mine and Adam's as well. Please let me know if you would like particular tracks from a CD.

Finished Product: In the mean time to hold you over, here are the piles of CDs that Adam and I brought to the party.
CDs for exchange '09-'10
Rebecca's CD collection


Adam's CD collection